Tag Archives: recipe

Balsamic Portabella and Red Pepper Wrap

Standard

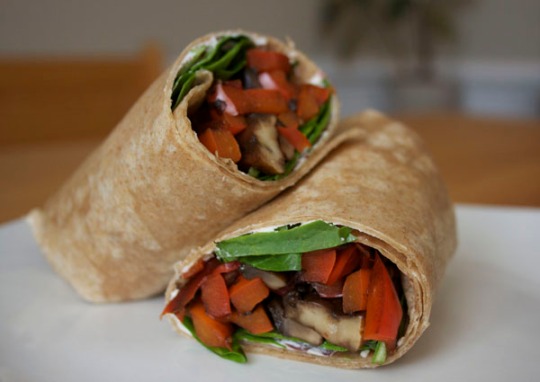
This portabella and red pepper wrap is inspired by a wrap that I got at a nearby bar & grill.  The only difference is that they use roasted red peppers, plain goat cheese, and garlic mayo.  My version doesn’t taste exactly like theirs, I’m assuming due to the garlic mayo, but I decided I could do without it.  I’ve made this several times now and it makes for a great lunch at work.

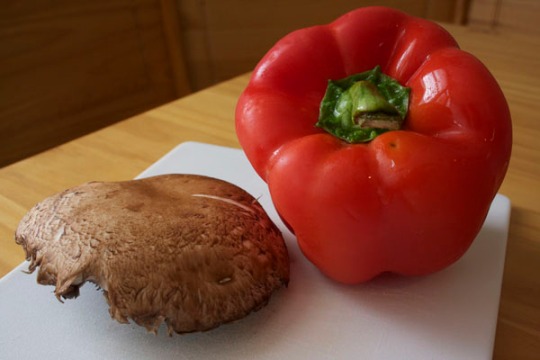
You want to start with a large portabella cap and a small red bell pepper.  In my case, this is the opposite, because it’s what I had to work with.  And make it work I did.
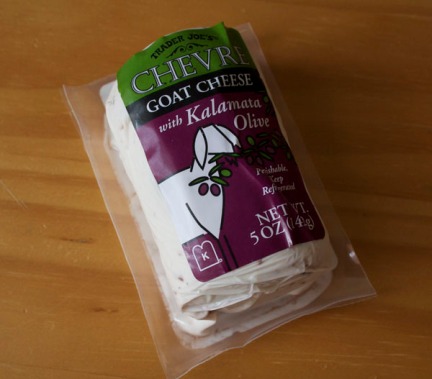
The other star of the show is Trader Joe’s goat cheese with kalamata olives.  Has anyone else tried this yet?  It’s delicious in all of its salty and creamy goodness.

Balsamic Portabella and Red Pepper Wrap

  • balsamic vinegar
  • goat cheese
  • 1 large portabella mushroom cap, cut into strips
  • 1 small red bell pepper, cut into strips
  • 1-2 cloves of garlic, minced
  • spinach
  • 1 large wrap

1.  Pour about 3 Tablespoons of balsamic vinegar in a nonstick pan.  Add the bell pepper and cook for about 5 minutes over medium heat.  I like to cook the bell pepper first because they take longer to cook than the mushrooms.

2.  Add the mushrooms, garlic, and about 3 Tablespoons more of balsamic vinegar.  Cook for about 10 minutes more, or until the vinegar has cooked out of the pan.

3.  Spread as much goat cheese as you like on the wrap, add a handful of spinach, the mushrooms and peppers, and then wrap it up.  The key to wrapping without it falling apart is to use the extra large wraps!
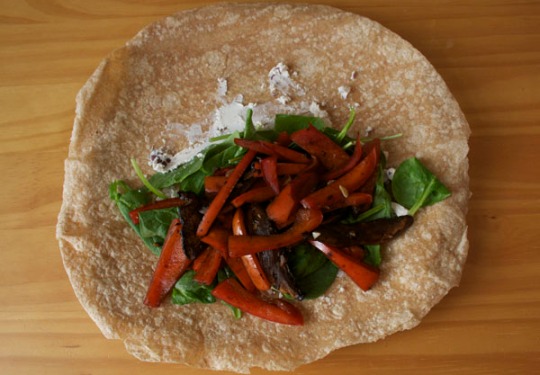
Happy Noms!
Whole Grain Chocolate Chip Cookies

Standard

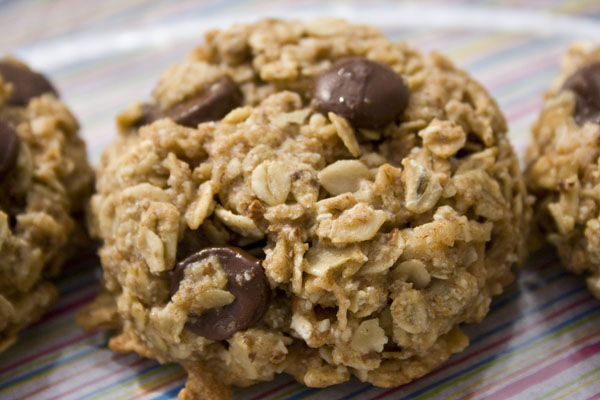
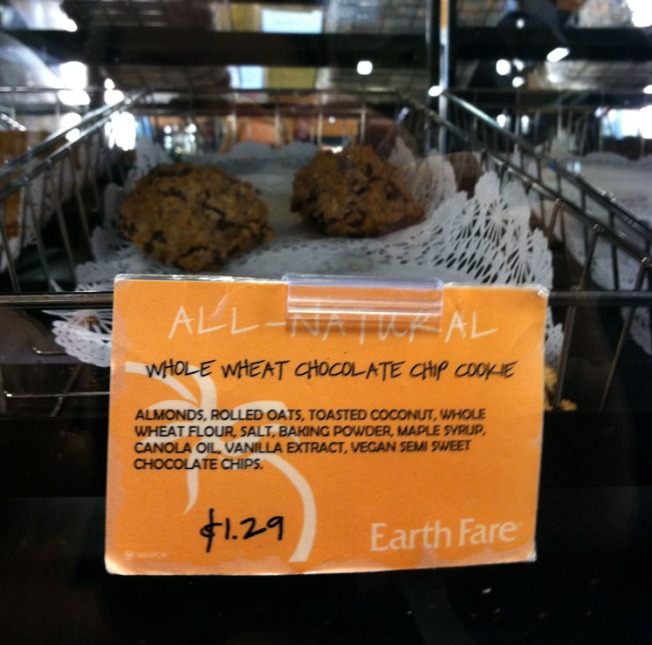
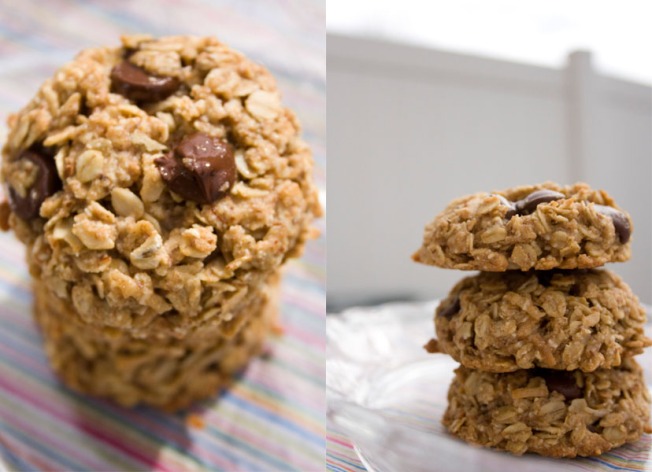
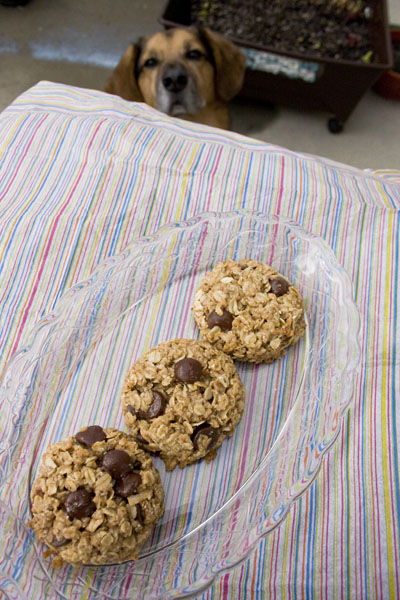
My absolute favorite cookie to get at Earth Fare is the Whole Wheat Chocolate Chip Cookie.  I love the sweetness and texture of these cookies.  It’s a little crumbly, dense, chewy, and super filling.  I decided to take a photo of the ingredients listed and see if I could create a copy cat version at home.

Look Ma! No eggs!

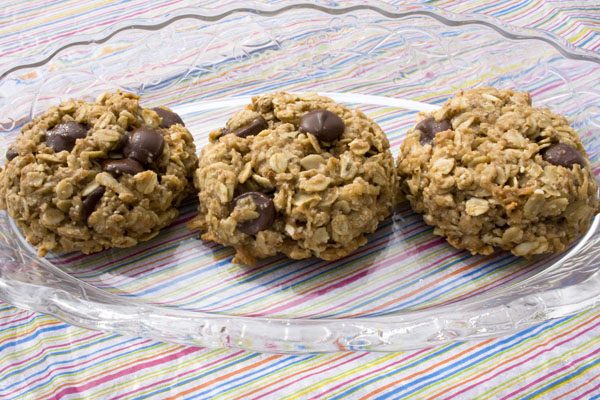
Although I do love eggs, these cookies don’t require them.  I used agave nectar instead of maple syrup and I used Ghirardelli 60% cacao bittersweet chocolate chips.  I think a more appropriate name for them would be whole grain chocolate chip cookies.

Whole Grain Chocolate Chip Cookies

Ingredients:

  • 2 cups rolled oats
  • 3/4 cup almond meal/flour  (you can find it at Trader joe’s or ground some almonds in your food processor)
  • 3/4 cup whole wheat flour
  • 1/2 cup toasted coconut – I used sweetened shredded coconut. (To toast – spread evenly on a baking sheet.  Bake at 350 degrees for 10-12 min or until light brown.)
  • 1 teaspoon salt
  • 1 teaspoon baking powder
  • 1 teaspoon vanilla extract
  • 3/4 cup agave nectar
  • 1/4 cup canola oil
  • 1/2 cup dark chocolate chips

1.  Combine the dry ingredients:

  • 2 cups rolled oats
  • 3/4 cup almond meal/flour  (you can find it at Trader joe’s or ground some almonds in your food processor)
  • 3/4 cup whole wheat flour
  • 1/2 cup toasted coconut – I used sweetened shredded coconut. (To toast – spread evenly on a baking sheet.  Bake at 350 degrees for 10-12 min or until light brown.)
  • 1 teaspoon salt
  • 1 teaspoon baking powder

Mix until all ingredients are well dispersed.

2.  Add:

  • 1 teaspoon vanilla extract
  • 3/4 cup agave nectar
  • 1/4 cup canola oil

Mix until the dry ingredients are all wet.

3.  Fold in the chips.

* The mixture will not be sticky like regular dough and you will not be able to mold the cookies by hand.

4.  Take a 1/3 of a cup measuring cup and fill it with the mixture; pressing and packing the mixture into the cup.  Lightly tap the mixture onto a lined baking sheet.

5.  Bake at 350 degrees for 10-12 minutes.  *The cookies will not rise or spread.

Makes 10 cookies.

I’m really proud with the way these cookies turned out and they taste very similar to Earth Fare’s version.  I thought these cookies seemed pretty healthy, but don’t be fooled.

1 cookie =

  • 354 calories
  • 16 grams of fat
  • 8 grams of protein
  • 17 grams of sugar

I suppose it’s still better than a regular cookie made with butter and white flour.  And using agave is better than white sugar since it has a low glycemic index.  You could use unsweetened coconut and use 1/4 cup of chocolate chips chopped to make them a little healthier.  Although really, the point of this was not to make healthy cookie, but a delicious sweet treat.  Mission accomplished.

Zucchini Chocolate Chip Muffins

Standard

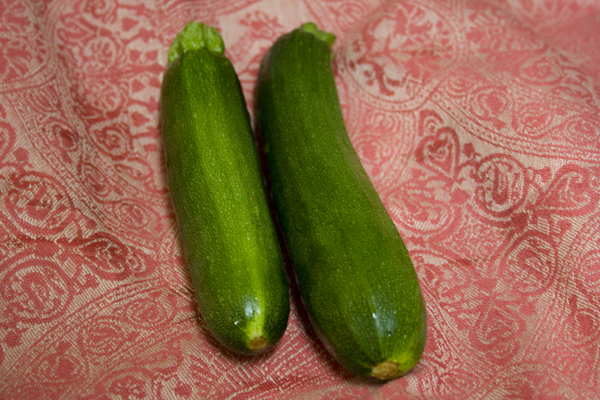
Who would ever think that these green veggie things would make such a wonderful dessert?

zucchini from Barbee Farms

My go to recipe is from The Better Homes and Garden Cookbook.  The recipe is actually for zucchini bread, but they make great muffins too.

I only change a few things from the original recipe.  I use half all-purpose flour and half whole wheat, and I use raw cane sugar instead of white sugar.  The raw cane sugar gives the tops of the muffins a bit of a crunch, while the inside is still soft.  I’ve used raw cane sugar in brownies and they didn’t turn out so well.  They tasted gritty, but it seems to work for these muffins.  I also replace the nuts with semi-sweet chocolate chips.

Zucchini Chocolate Chip Muffins (adapted from the The Better Homes and Garden Cookbook)

Makes 12 muffins

Ingredients:

  • 3/4 cup all-purpose flour
  • 3/4 cup whole wheat flour
  • 1 teaspoon ground cinnamon
  • 1/2 teaspoon baking soda
  • 1/2 teaspoon salt
  • 1/4 teaspoon baking powder
  • 1/4 teaspoon ground nutmeg
  • 1 egg, beaten
  • 1 cup raw cane sugar
  • 1 cup finely shredded,  peeled zucchini
  • 1/4 cup cooking oil
  • 1/2 cup semi-sweet chocolate chips

1. Preheat oven to 350 degrees.  Prepare a muffin pan with 12 muffin liners and spray with a non-stick cooking spray.

2. Mix together in a large bowl:

  • 3/4 cup all-purpose flour
  • 3/4 cup whole wheat flour
  • 1 teaspoon ground cinnamon
  • 1/2 teaspoon baking soda
  • 1/2 teaspoon salt
  • 1/4 teaspoon baking powder
  • 1/4 teaspoon ground nutmeg
3. In a separate medium-sized bowl, mix together:
  • 1 egg, beaten
  • 1 cup raw cane sugar
  • 1 cup finely shredded,  peeled zucchini
  • 1/4 cup cooking oil
4. Add the wet mixture to the flour mixture.  Stir until just mixed (do not over mix).  The batter will be lumpy and that’s OK.  Fold in chips.
5. Fill cups 2/3 of the way full.  Bake 350 degrees for 20 minutes.
The best way to eat zucchini in my opinion.

Vegged Out

Standard

I think a more appropriate name for this blog would be “Veggie Queen.”

I managed to cook turnips, yellow squash, butternut squash, and bok choy tonight from my Barbee Farms CSA.

I’m not really familiar with cooking turnips, but I have had them raw.  They’re OK.  I figured I couldn’t go wrong with roasting.

To Roast Veggies:

  1. Peel the butternut squash and turnips.
  2. Chop the butternut squash and turnips, along with the yellow squash.  
  3. Toss them with olive oil in a bag to coat, and spread them on a non-stick coated baking sheet.  
  4. Sprinkle with sea salt, pepper, and Garlic Gold and bake at 425 degrees for 30  minutes.

In the meantime, I prepared the  bok choy.

Bok Choy

  1. Wash and chop one head of bok choy.
  2. Pour about 3 Tablespoons of soy sauce in a non-stick pan, and cook the white part of the bok choy for about 5 minutes on medium heat (since they take longer to soften).
  3. Add the rest of the bok choy and cook until the leaves are just wilted.
  4. Take off the heat and drizzle a little bit of toasted sesame oil and sprinkle with red pepper.
So, the yellow squash turned out beautifully.  It melts in your mouth and the Garlic Gold gives it a slight crunch.  The turnips were a little bitter and firmer.  Maybe they needed to cook longer…I don’t think I’m a fan.  Maybe I just don’t know the best way to cook them.
The bok choy was awesome.  I can’t believe it cooked down so much.  To give you perspective, what is on my plate is the whole head of bok choy (with the exception of a few stems).  This is probably about a cup of bok choy.
I made soup with the roasted butternut squash.

Butternut Squash Soup

serves  4

Ingredients

  • 2 small butternut squash – peeled, chopped and roasted.
  • 1 yellow onion
  • 2 Tablespoons of butter or Earth Balance
  • 2 Tablespoons of 100% pure maple syrup
  • 32 ounces of chicken or vegetable broth, or Trader Joe’s butternut squash soup.
  • 1 cup water
  • 1 – 15 ounce can black beans, drained and rinsed
  • 1 cup of corn, frozen or fresh
  • 1/2 teaspoon of salt
  • 3 dashes of nutmeg
  • pinch of white pepper to season
  1. Saute the onion with the butter for 5 minutes over medium heat.
  2. Add the maple syrup to the onion and cook an additional 5 minutes on low heat.
  3. Add the black beans, corn, roasted butternut squash, and seasonings.
  4. Add the broth and water and turn to medium heat.
  5. Wait for the soup to come to a boil and then turn heat to low and simmer for 15 minutes.
I ate one bowl and then froze the rest in freezer safe containers, so that I can take them to work for lunch next week.
I promise something sweet tomorrow!

Sweet Potato Fries

Standard

Say hello to the sweet potatoes from Barbee Farms.  Sweet potatoes are one of my favorite vegetables, and I made these babies into some delicious fries.

Sweet Potato Fries

Ingredients:

  • sweet potatoes
  • olive oil
  • plain panko bread crumbs
  • dried basil
  • dried oregano
  • salt
1.  Peel and cut your taters.
2.  Pour about 3 Tablespoons (or more if needed) of olive oil in a plastic bag.  Put the taters in the bag and shake to coat.
3.  Put about a cup of bread crumbs on a plate and mix with 1/2 Tablespoon each of oregano and basil.  Then roll a couple of taters around the plate at a time to pick up the mixture, pressing the crumbs in if needed.  These will not have a heavy coating.
4.  Place on a baking sheet that has been coated with a non-stick spray.  Then generously sprinkle with sea salt.  I like to use Trader Joe’s Smoked sea salt.
5.  Bake at 400 degrees for 30-40 minutes.
Enjoy!
P.S.  I would also like to take the time to gush about my $10 apron that I found at Target.
Happy Halloween!

Breakfast Corn Fritters

Standard

Fall is in the air and I’m loving it.  I’m also loving the fall veggies that I’m getting in my CSA from Barbee Farms.  I thought it would be neat to share with you how I use the veggies that I get in my box this week.  Here is what I have:

  • 3 ears corn
  • 2 bell pepper
  • 1 head bok choy
  • 4 small sweet potatoes
  • 2 turnips
  • 1 yellow squash
  • 2 zucchini
Let’s start with the corn shall we?
I don’t usually think of eating corn for breakfast, but cook it up like a pancake and douse it with syrup and I’m good to go!  This recipe comes from the Stonewall Kitchen Breakfast Cookbook.  I have a handy-dandy cookbook holder that I use, given to me as a wedding gift by my Aunt.  (Thanks Aunt Sue!)

Breakfast Corn Fritters

Ingredients:

  • 1/2 cup all-purpose flour
  • 1/2 teaspoon baking powder
  • pinch of salt
  • 1/4 cup milk
  • 1 large egg, lightly beaten
  • 2 cups fresh corn kernels cut off 2-3 large cobs
  1.  In a large bowl, sift together flour, baking powder, and salt.
  2. Add the milk and whisk until smooth. I had to add a bit more milk to make it smooth.
  3. Beat in the egg.
  4. Gently mix in the corn.
  5. In a large skillet, heat 3 Tablespoons of oil over med-high heat.  Drop 3 Tablespoons of batter into the pan and flatten the mixture.  Cook for 2-3 minutes on each side.
Top with butter and maple syrup.
These taste just like a pancake with corn in them.  I like to call them corn cakes.  Vee said “I like it, but it’s not something I’d order off the menu.”  Don’t listen to him.  They are delish.  The corn makes them sweet and I love the crunch they give against the soft flour.
Charlie and I spent the rest of the day gazing out the window.

BBQ Chicken Pizza with Arugula and Sunflower Seeds

Standard

Go ahead and break out your elastic waistband pants, because you’re going to want to eat a lot of this.

I’ve never been good with measurements, but here is the ingredient list with estimated measurements:

  • 1.5  cups shredded chicken
  • 1 cup barbecue sauce
  • 2 cups arugula
  • 1 cup shredded mozzarella
  • pizza dough
  • sunflower seeds
  • dried oregano
  • Italian garlic gold nuggets

First, boil your chicken.  I used Windy Hill Farm chicken tenders.  I’m not really sure how long…..because I came home, put the burner on high, and went into another room to read some blogs.  It was when I heard a big gurgle and PLOP, that I realized “oh yeah, I’m boiling chicken.”  I’d say maybe 20 minutes should do it.

Then I shredded the chicken, placed it in a baking dish, and smothered it in barbecue sauce.  I put it in the oven at 200 degrees for an hour while I went to the gym.  This warmed up the barbecue sauce and made the chicken a little more tender.  If you don’t want to go to the gym for an hour (you know you should), you could just crank up the oven to 400 degrees for about 20 minutes, or just skip the oven part all together.

Still with me? Listen carefully.

It’s important to spray your pan before you do anything else!  I often times forget.

Next, prepare your dough as directed on the package.  I used Trader Joe’s refrigerated dough.  All I have to do is set it out for 20 minutes, then I stretch it and shake it like a Polaroid picture.  Heyah.

Spread some olive oil on top.

Vee is our hand model for this evening.

Spread some barbecue sauce on top.  Don’t go overboard, you will still have lots of sauce on the chicken.

Top that off with some sprinkles of dried oregano and Italian Garlic Gold Nuggets.  If you have not tried Garlic Gold Nuggets, then you are truly missing out.  The name is, as implies – GOLD.  I am officially out.

Wash the arugula and send it through the salad spinner.  If you do not have  a salad spinner, be sure to blot all the moisture you can with paper towels.  No one wants a soggy pizza!

Cheese please!

Add the chicken.

Top it all off with sprinkles of love sunflower seeds.

Pop it in the oven at 350 degrees for 20 minutes.